Overview
The date picker appears at the top of most data pages and controls which time period is shown. Use it to select a preset period, step forward or backward through periods, or enter a custom date or range.
Prerequisites
- You are logged in to Nuonic.
Steps
Select a preset period
- Click the date picker button (showing the current period name and date range).
- The dropdown shows three groups of presets — Current (This month, This quarter, This financial year), Previous (Last month, Last quarter, Last financial year), and To date (Month to date, Quarter to date, Year to date).
- Click any preset to apply it immediately.
Step forward or backward
- Use the
<and>arrow buttons on either side of the date picker to shift the selected period by one step in either direction. - For example, if
This quarteris selected, clicking<switches toLast quarter.
Pick a custom date
- Click the date picker button to open the dropdown.
- Select
Pick a date. - Click any date on the calendar to apply it.
Pick a custom date range
- Click the date picker button to open the dropdown.
- Select
Custom date range. - Click the start date, then click the end date. The range is applied when both dates are selected.
- To go back to the presets list, click
Back.
Screenshots
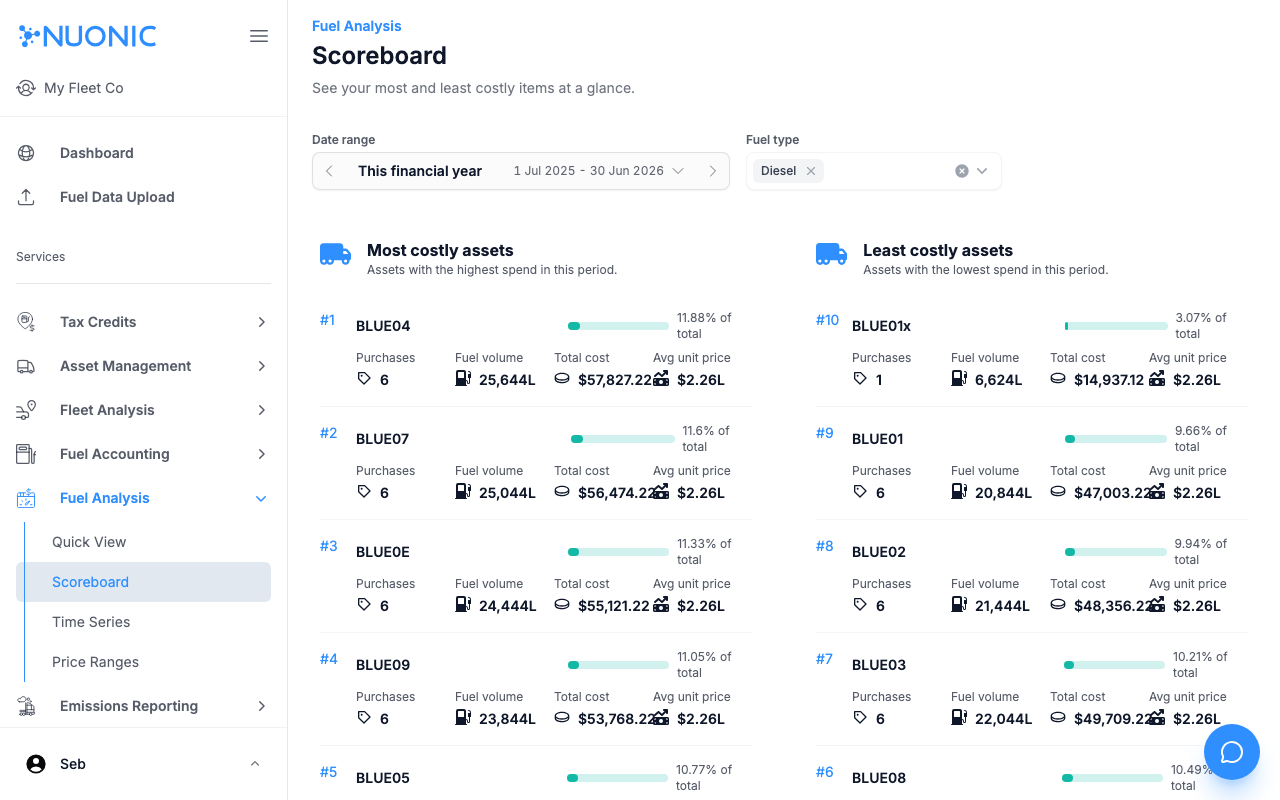
The date picker shows the current period name and its exact date range. Use the arrow buttons on either side to step through periods without opening the dropdown.
Opening the date picker shows preset options grouped into Current, Previous, and To date, with custom date and date range options at the bottom.

Troubleshooting
- If data appears empty after changing the date range, check that records exist for that period.
- The date picker is synchronised across pages — changing it on one page updates it on others.