Overview
Upload your fuel statement, review the extracted transactions, and match each statement asset to the correct Nuonic asset before importing the data.
Steps
- Open
Fuel Data Upload. - Upload your fuel statement using
Browse Filesor drag and drop the file into the upload area. - Wait for the file to appear in
Extraction jobs, then open the filename link. - In
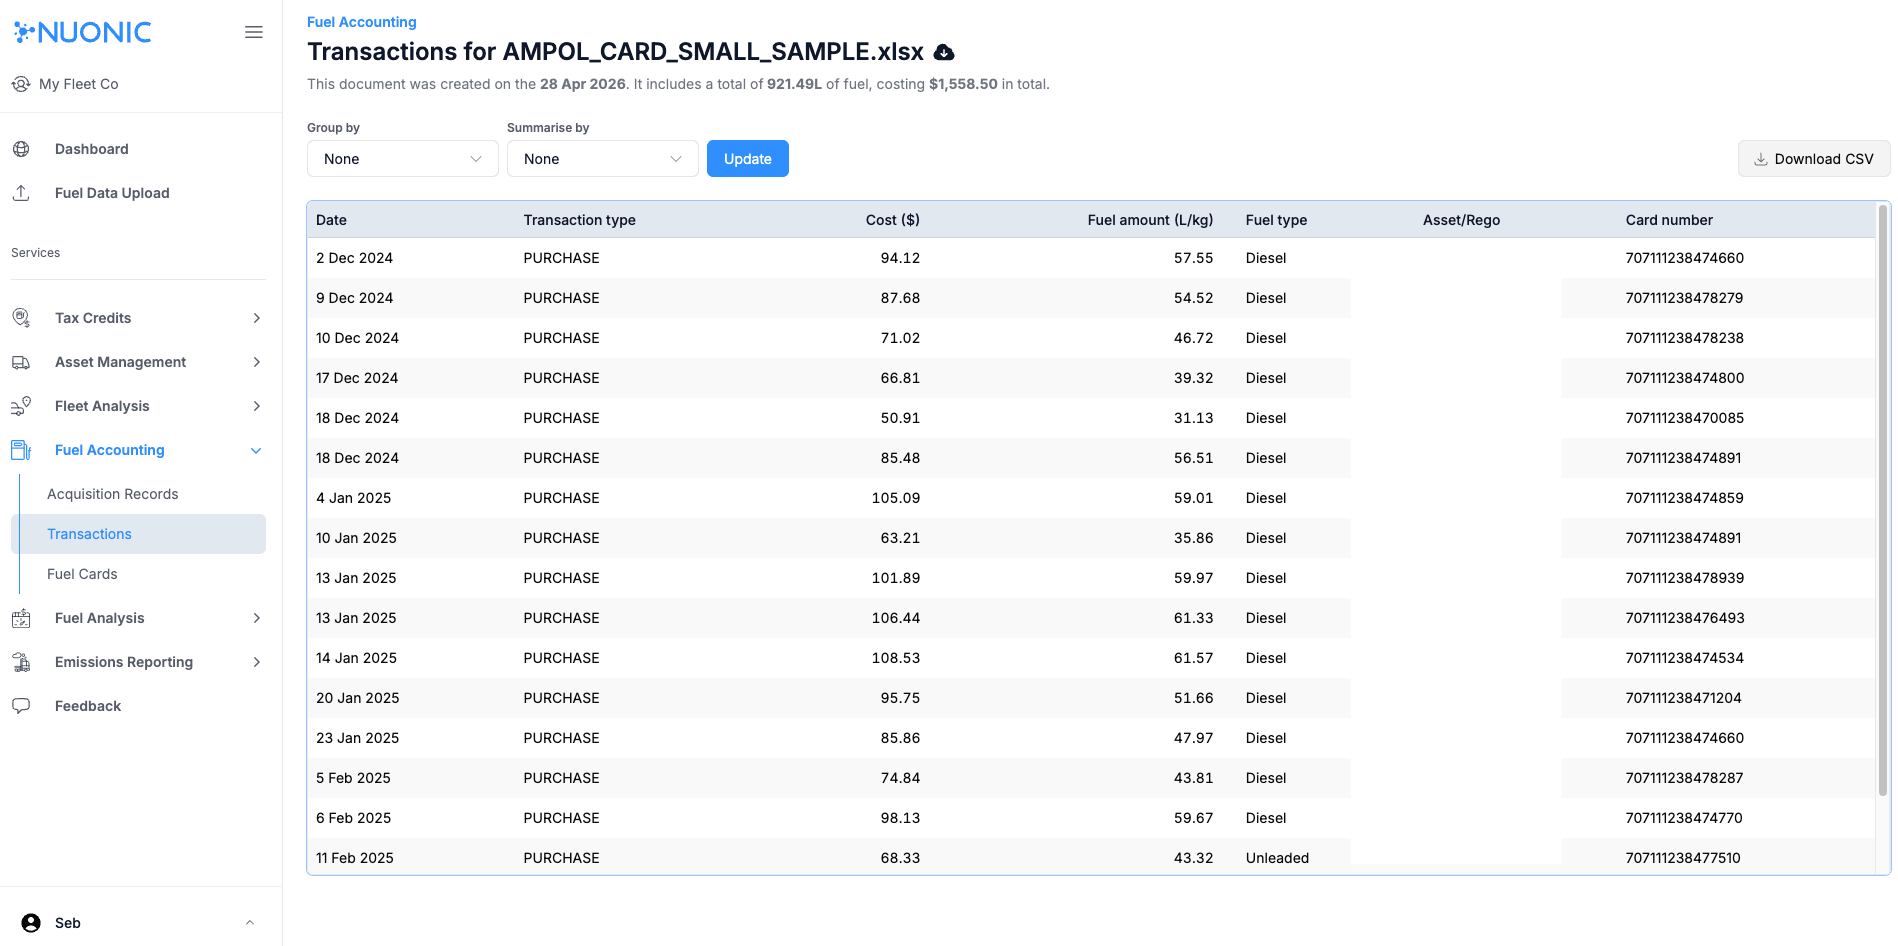
Document analysis, review the extracted summary, including:
Total fuel (Litres)Total costTotal assets found in statementAssets matched to existing records
- Select
Reviewto openReview Imported Transactions. - In the transactions table, compare
Statement AssetwithLinked Asset. - For any row that is unmatched or linked incorrectly, select
Edit Asset Matchand choose the correct asset. - Repeat this for each transaction until the asset links are correct.
- Select
Review Complete - Import Transactionsto finish the import. - Open
Fuel Accounting > Acquisition Recordsand confirm the imported record appears in the list.
Screenshots
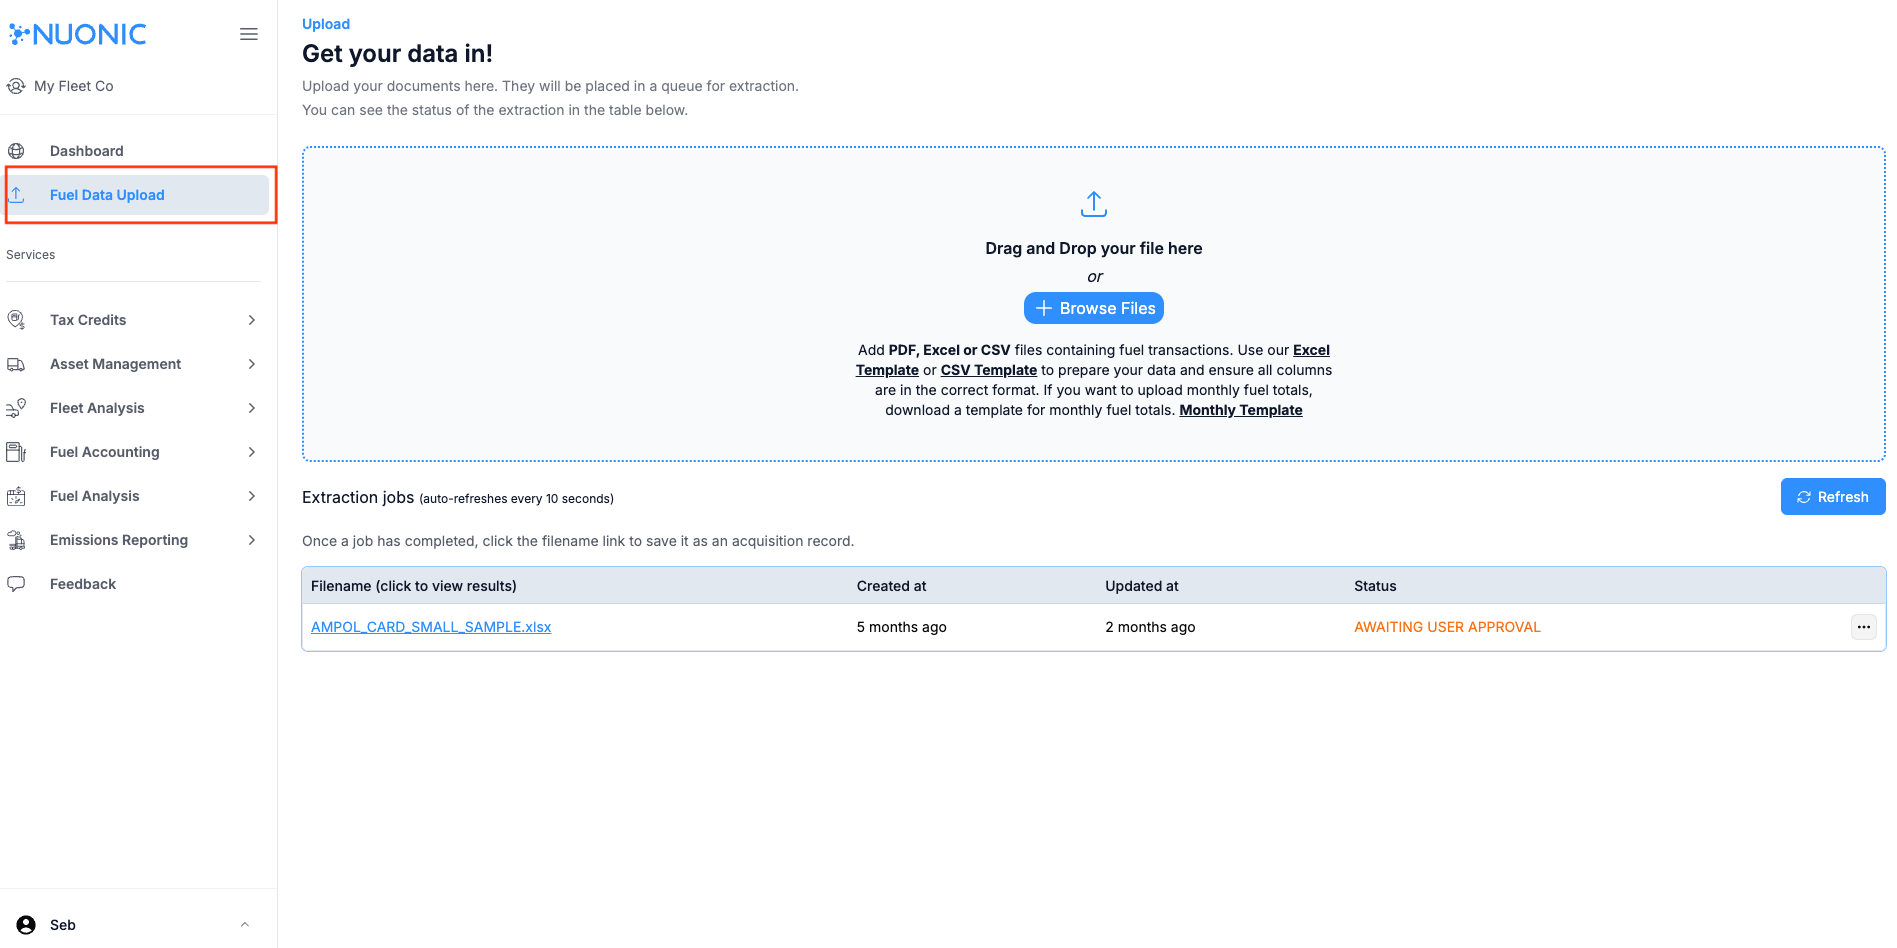 Shows the upload area and the
 Extraction jobs table where uploaded files are processed.
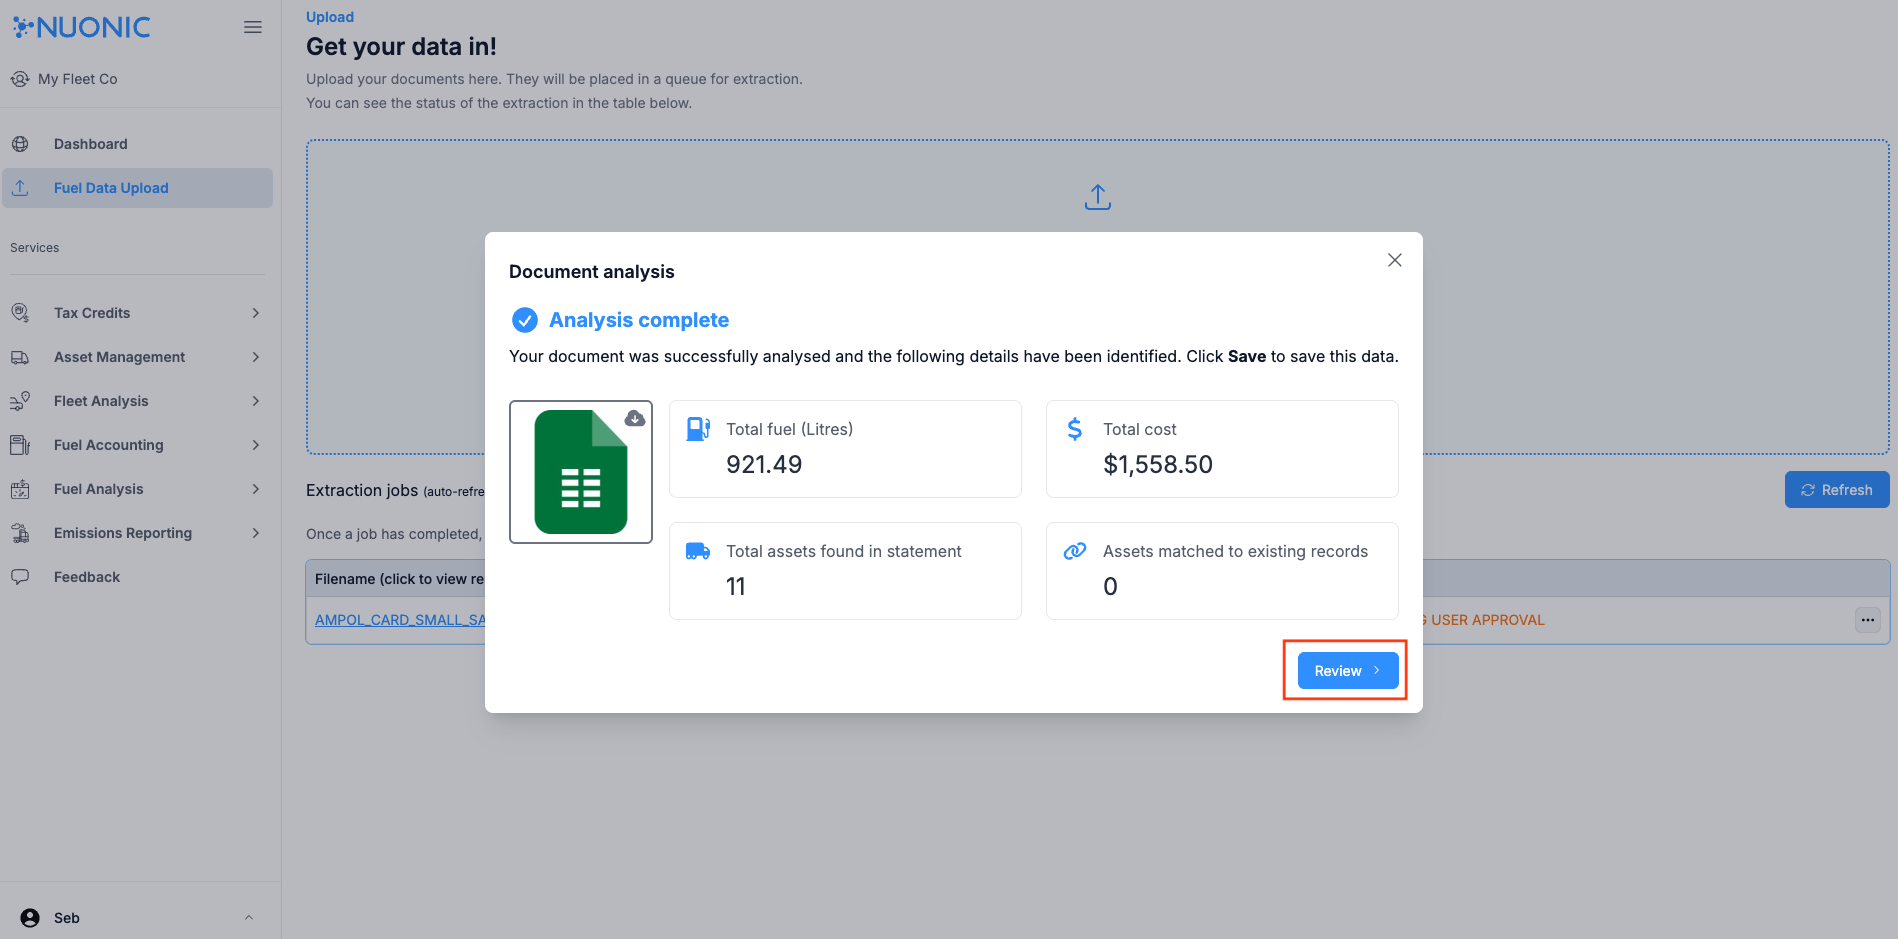 Shows the extracted fuel summary before reviewing the imported transactions.
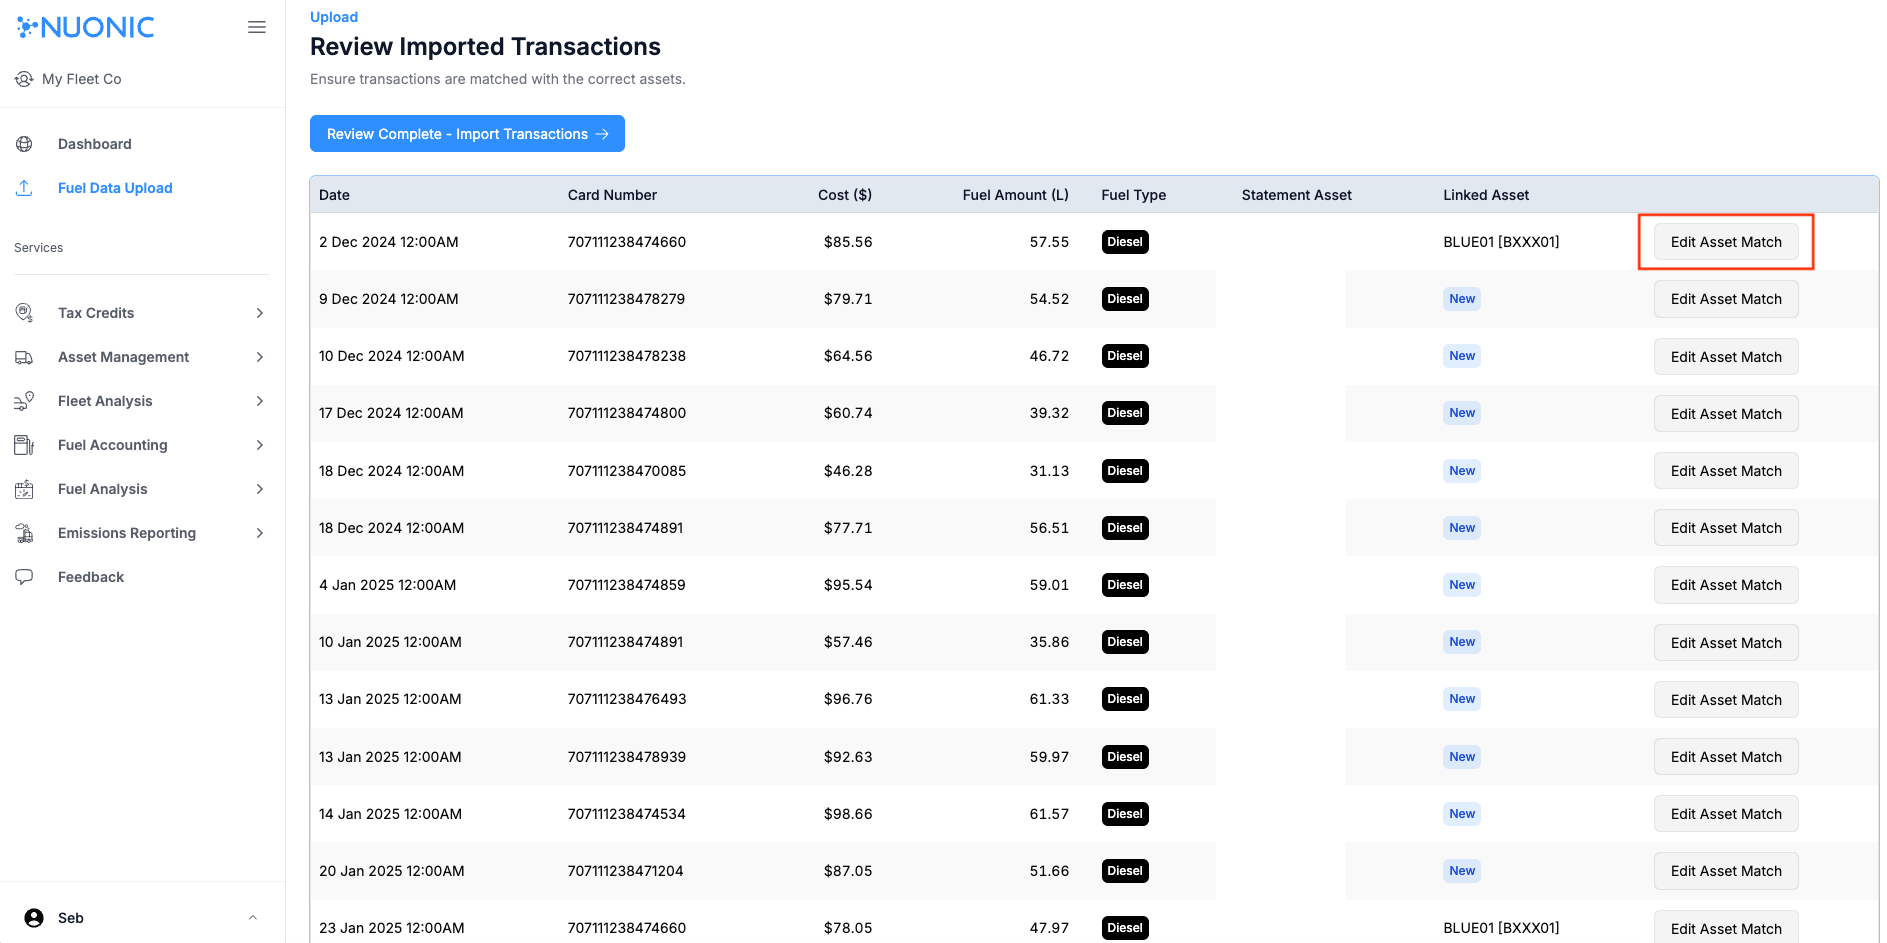 Shows the
 Statement Asset and Linked Asset columns used to review asset matching.
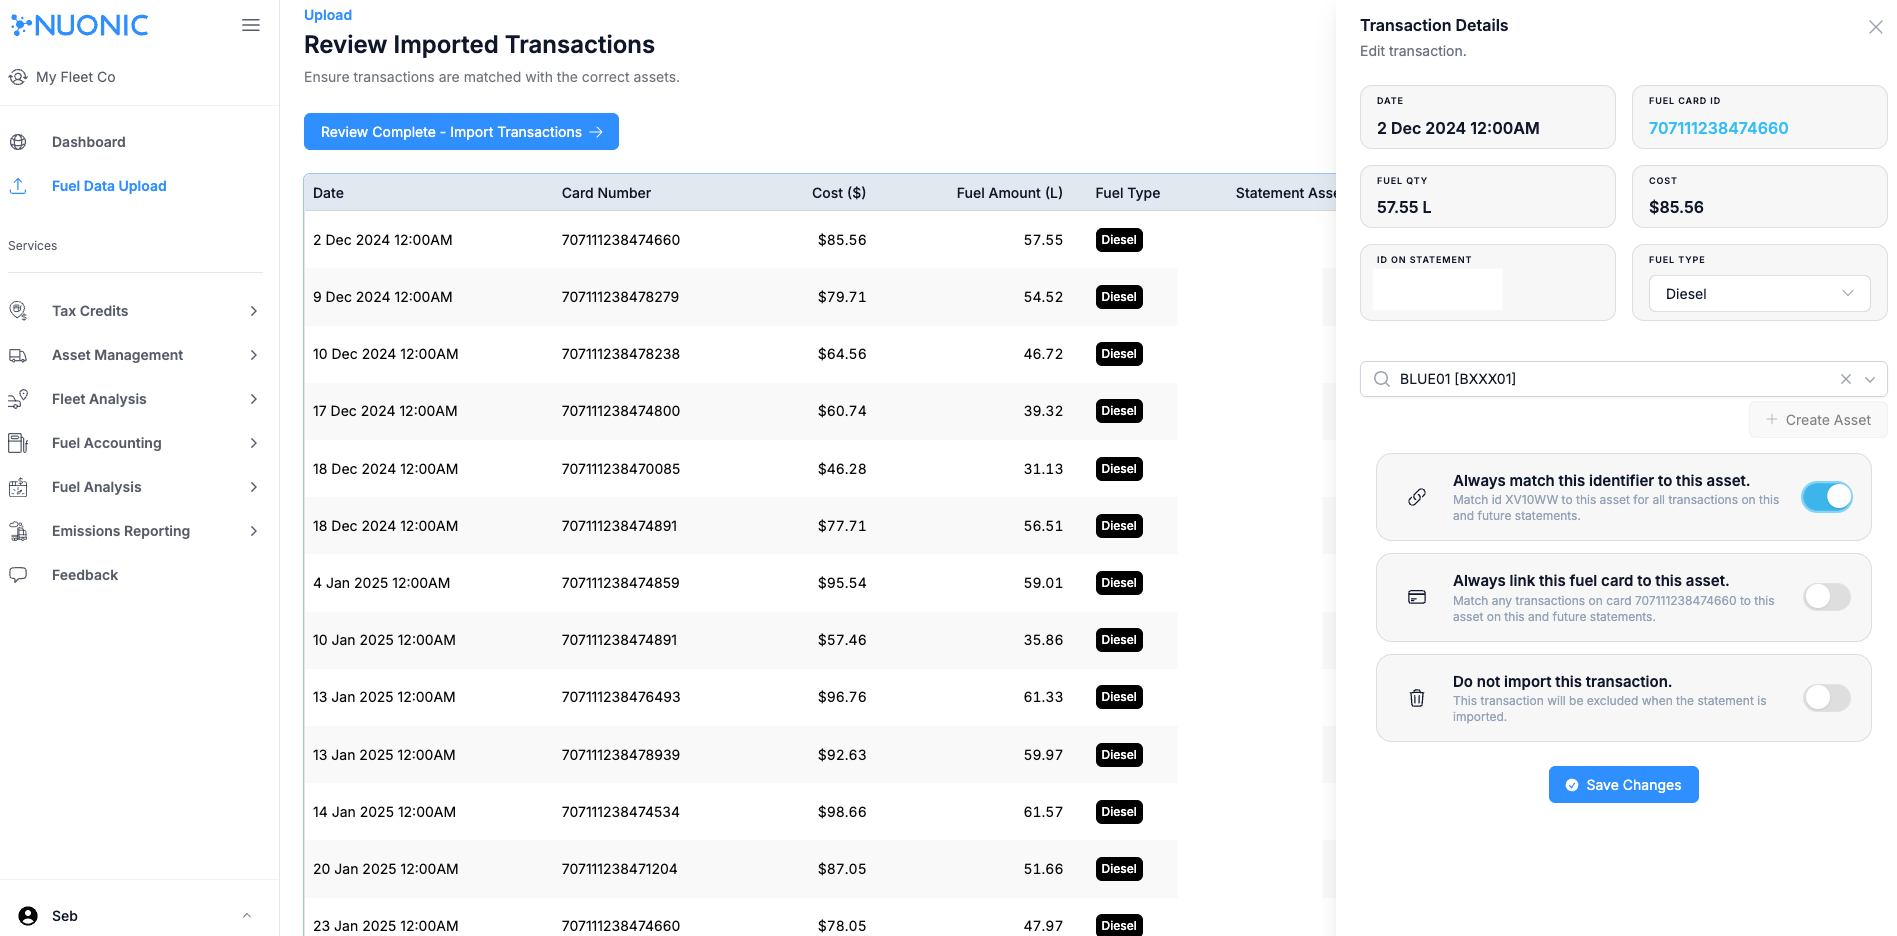 Shows the asset matching step for correcting or assigning the linked asset.
 Shows the imported acquisition record after the reviewed transactions have been saved.
Troubleshooting
- If a job remains in a pending or approval state, open the row and complete the required review actions.
- If a transaction shows
NewinLinked Asset, useEdit Asset Matchbefore completing the import. - If the imported record does not appear in
Acquisition Records, refresh the page and confirm the review step was completed.