Overview
Use Custom geofences to create location-specific rules that are applied to GPS apportionment. This allows a defined area to be treated as public or non-public for a specified time period.
Steps
- Open
Tax Credits > GPS Apportionment. - In
Location review, openCustom geofences. - Enter the geofence details.
- Define the geofence area by drawing a custom polygon on the map.
- Classify the geofence as
PublicorNon-public. - Apply the required date or time settings.
- Save the geofence and review the result.
- If retrospective changes are required for previously processed GPS data, contact the Nuonic team with the geofence details for review and possible reprocessing.
Screenshots
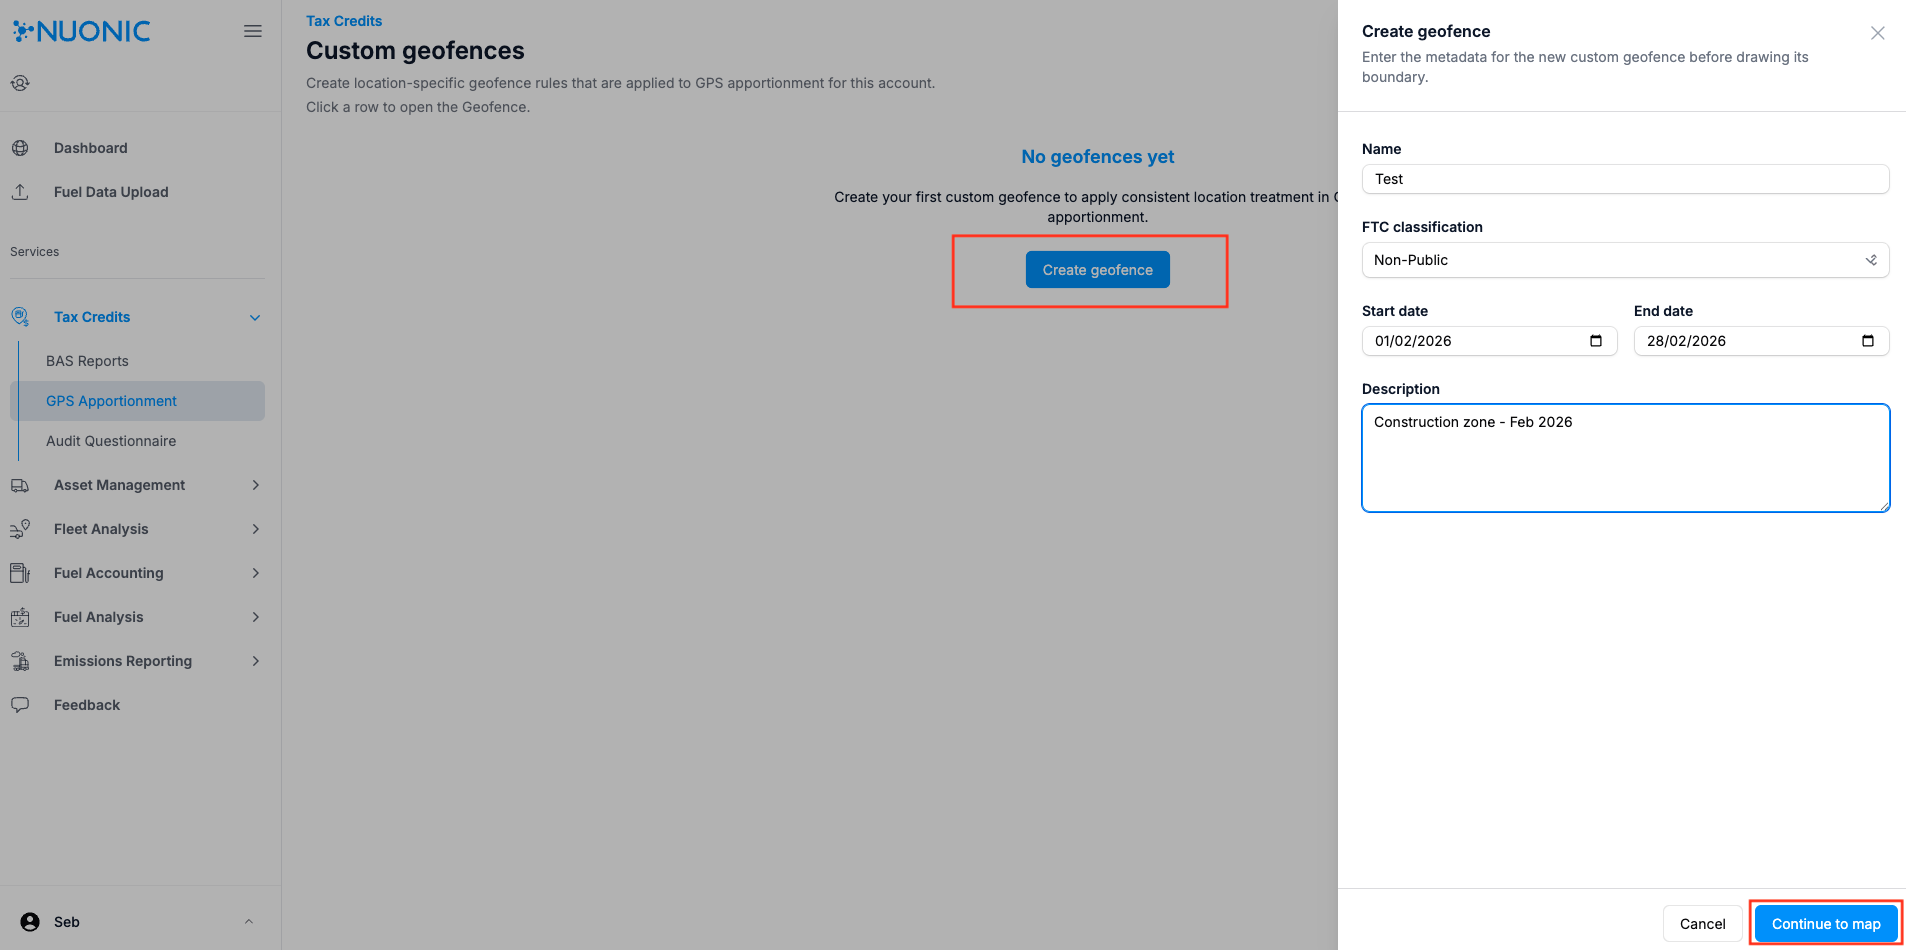 Shows the custom geofence input fields used to define the rule details.
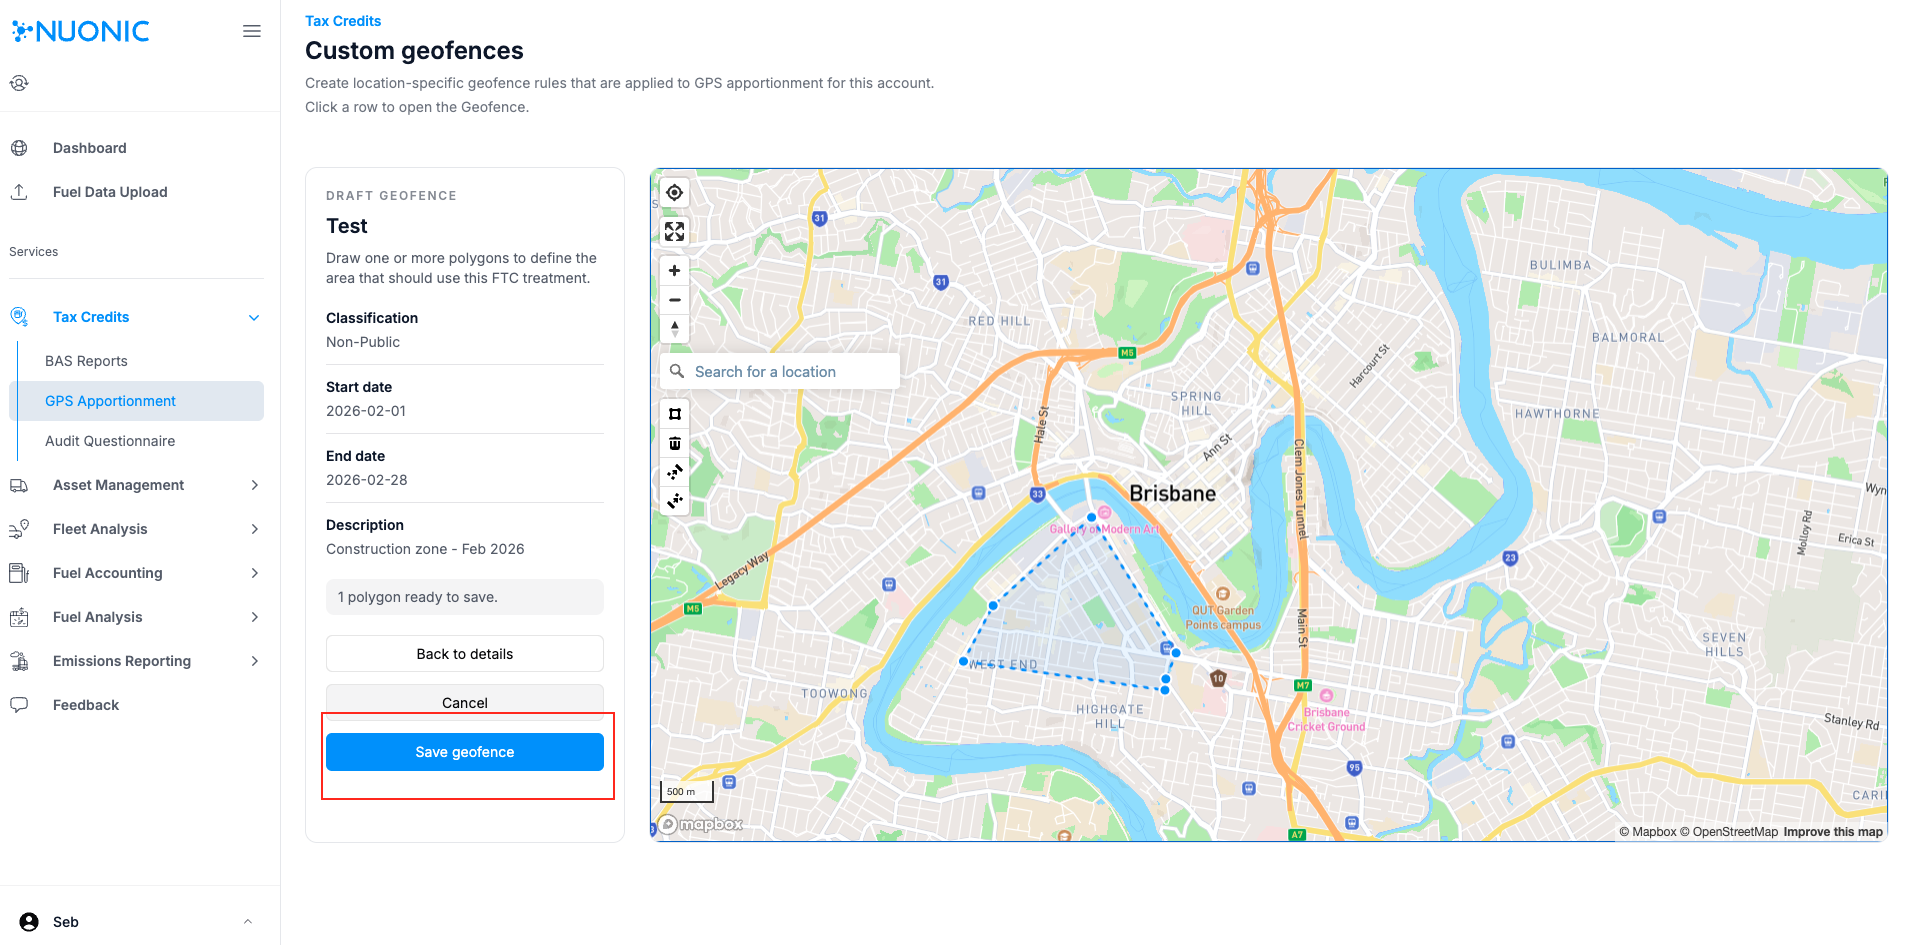 Shows how a custom polygon or geofence can be defined on the map.
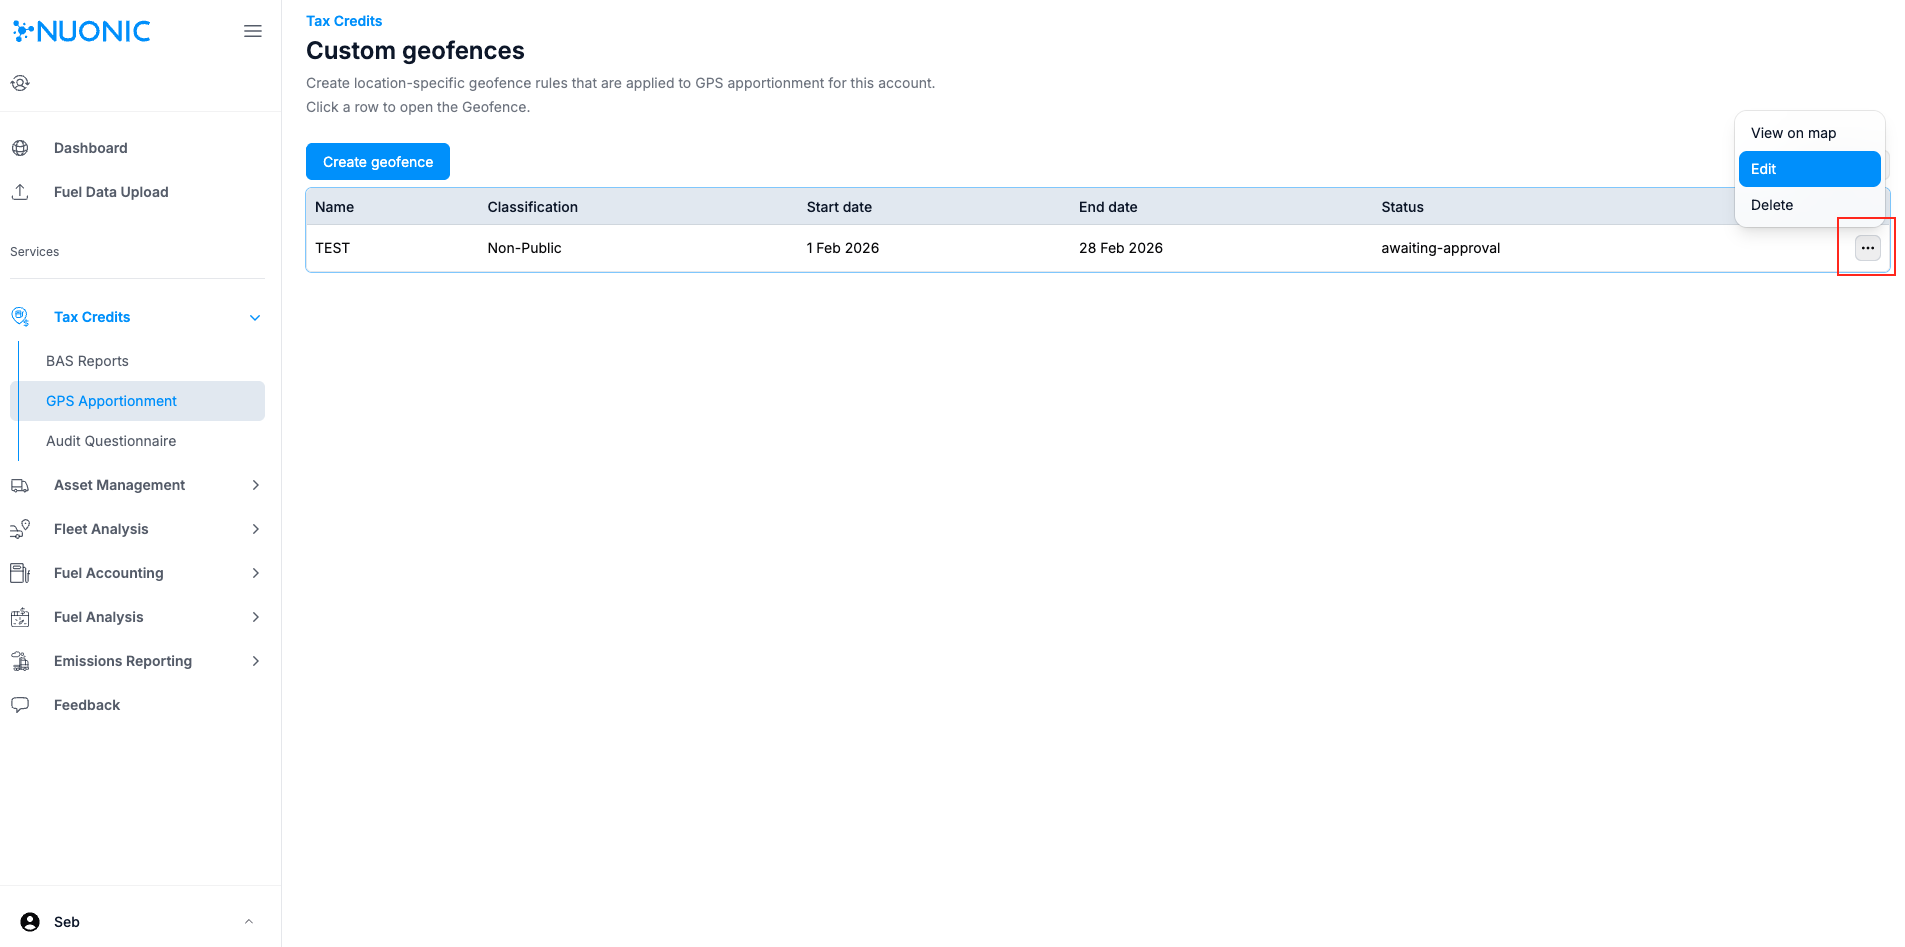 Shows an existing custom geofence being reviewed or edited.
Troubleshooting
- If the geofence does not reflect the intended area, review the polygon placement before saving.
- If the classification is incorrect, update the geofence settings and save the revised rule.
- If retrospective changes are required for previously processed GPS data, contact the Nuonic team with the relevant geofence details.